SLIDER

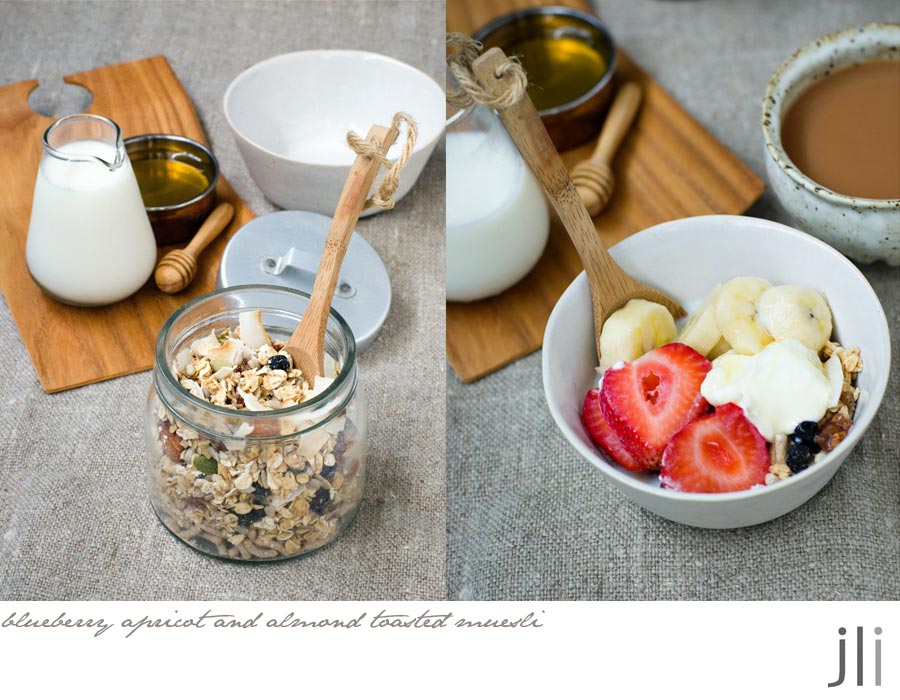
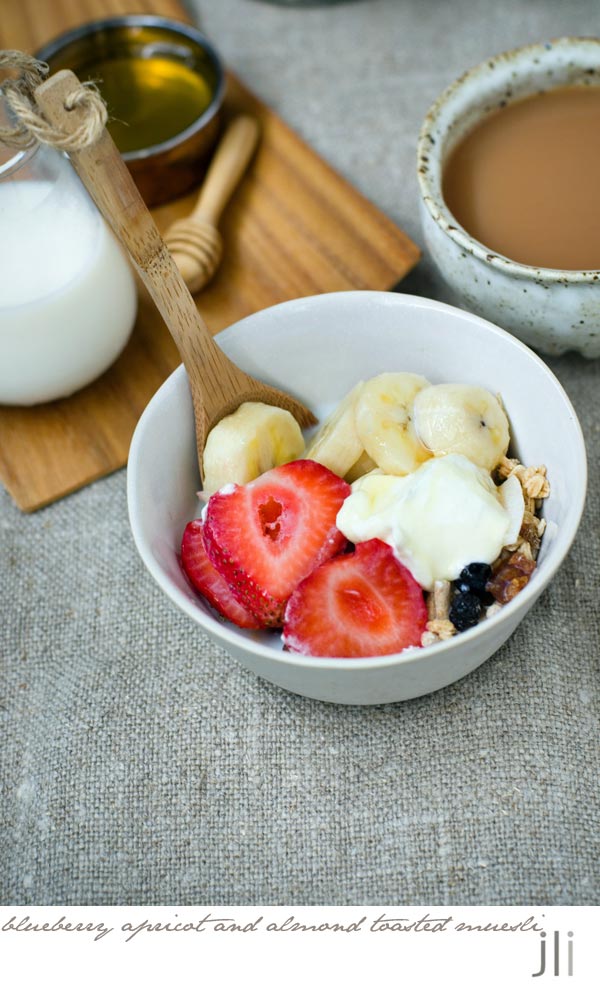
blueberry apricot and almond toasted muesli

26 Jan 2022


I'm such a creature of habit.
Every morning I have a bowl of muesli for breakfast unless I go out for breakfast, then it's eggs all the way. While I was home during the last lock-down, I spent a lot of time going through my old recipe books. Whilst looking through my copy of 'Bill's Open Kitchen' by Bill Granger I came across his recipe for blueberry and almond toasted muesli. I was just about out of muesli and I had everything I needed to make a batch, though not quite enough dried blueberries. I like dried apricots so I added a few to the mix.

The recipe is easy to customise so I made a few changes. The original recipe included sesame seeds, which I found their flavour a bit too assertive for breakfast so I left them out and added a little bit more of everything else. I also reduced the oil in the recipe because the olive oil spray seemed to do the trick. Once cold you add all the dried fruits then store in a sealed container. I normally throw in a spoon of bran cereal just before serving, then I like to top my muesli with sliced peaches or bananas, berries, yoghurt then either a drizzle of honey or maple syrup.


Here’s the recipe for you which the book says serves 4, but one batch does me for about 2 weeks. For all my recipes I use a 250ml cup and a 20ml tablespoon, unsalted butter and 60g eggs. My oven is a conventional gas oven so if your oven is fan forced you may need to reduce the oven temperature by 20°C.
 

Bill Granger Blueberry, Apricot and Almond Toasted Muesli
Ingredients
Olive oil spray
300g rolled oats
1 tbs vegetable oil
125ml apple juice
85g raw almonds
125g sunflower seeds
50g pumpkin seeds
35g flaked coconut
60g dried blueberries or currants
60g dried apricots, coarsely chopped

To serve
Fruit, yoghurt, honey and milk

Method

Preheat the oven to 160°C, conventional. Lightly spray a large baking tray with olive oil spray.

Place all the ingredients except for the dried blueberries and apricots in a large bowl and stir well to combine.

Spread the mixture evenly over the tray then lightly spray the top of the muesli with the olive oil spray. Place the tray in the preheated oven and bake for 30 minutes, stirring occasionally until lightly browned. Remove from the oven and allow to cool completely before stirring through the blueberries and dried apricots.


Home made toasted muesli that's low in sugar and fat and tastes good as well. Thanks Bill.

See you all again next week with some more baking from my kitchen. 

Bye for now,

Jillian

PRINT RECIPE

chocolate lamington cupcakes

23 Jan 2022


Australia Day is just around the corner and every year I like to play around with that Australian classic, the lamington. In the past I've made lamington gelato, lamington layer cakes, lamington cupcakes, classic lamingtons and lamingtons soaked with buttermilk pannacotta.


So what did I do this year? I made chocolate lamington cupcakes which I soaked in a vanilla syrup then sandwiched with raspberry jam and a cloud of vanilla flavoured whipped cream. It's the lamington you didn't even know you needed. There is no need to thank me.


The cake element is a chocolate Victoria sponge and the cake is quite delicate. You'll need to start this recipe the day before serving to allow the cakes time to cool and firm up prior to icing. Once the icing has dried, the cakes are split and filled. If you don't feel like going to all the effort, I'm sure the cupcakes would still be delicious just iced and decorated with coconut.


Here's the recipe for you which makes 11 friand size cupcakes or 12 muffin size cupcakes. For all my recipes I use a 250 ml cup, a 20 ml tablespoon, unsalted butter and 60 g eggs. My oven is a conventional oven so if you have a fan-forced oven you may need to reduce the temperature by 20°C. Remember its best to bake the cakes the day before icing or they might crumble.

Cake  
135g self-raising flour
20g Dutch process cocoa
½ tsp baking powder
Pinch salt
150g unsalted butter, softened
150g caster sugar
1 tsp vanilla extract
2 room temperature eggs, lightly beaten
¼ cup (60 ml) buttermilk 
 
Vanilla Syrup
50g sugar
50mls water
½ tsp vanilla bean paste or ½ vanilla bean, seeds scraped 
 
Chocolate Dip
5g (1 tsp) butter 
30g (1oz) dark chocolate, coarsely chopped 
1 cup (150g) sifted icing sugar 
12g (1½ tbs) Dutch process cocoa, sifted 
½ tsp vanilla extract 
¼ cup (60 ml) milk 
 
To decorate 
½ cup of desiccated or shredded coconut 

Filling
½ cup of raspberry jam 
300 mls cream, softly whipped with ½ tsp vanilla bean paste and 3 tsp caster sugar
 
Cakes 
Pre-heat the oven to 180°C conventional and grease and dust the holes of a friand tray with cocoa. I like to place a small square of baking paper in the base of each friand hole. 
 
Sift the flour, cocoa, baking powder and salt together into a small bowl and set to one side. Using a stand mixer or hand held beaters, cream together the butter, sugar and vanilla until the mixture is light in colour and fluffy. 
 
Gradually incorporate the beaten eggs and mix until combined. Add one third of the flour mixture to the batter and mix until just combined. Add half the buttermilk and mix well. Repeat until all the ingredients are just incorporated. 
 
Divide the batter evenly between the tins and level the tops. Bake for 20-25 minutes or until the cakes bounce back when pressed lightly, or a skewer inserted into the top of the cake comes out clean. Leave to cool in the tin for 15 minutes before turning out onto a rack to cool completely. When cool, place in an airtight container then chill the cakes overnight in the fridge. This will help firm the cakes and make them easier to handle when icing. 
 
Vanilla Syrup
Place the sugar and water into a small saucepan. Place over a medium heat and stir to dissolve the sugar. Bring the mixture to a boil then lower to a simmer and simmer for 2-3 minutes or until the mixture has slightly thickened. Take off the heat and stir through the vanilla bean paste or vanilla pod and seeds. Allow to cool completely before using. 
 
Chocolate Dip
Melt the butter and chocolate in a medium heatproof bowl over a saucepan of simmering water. Stir sifted icing sugar and cocoa into the chocolate. Add the vanilla extract and enough milk to make an icing of a coating consistency. If the icing thickens too much thin it out with a little more milk or water or you can zap it in the microwave for about 20 seconds on high. 
 
Method  
Dip each cake into the chocolate icing covering the top and sides. Place on a wire rack over a tray to catch any drips then sprinkle the top of each cake with the desiccated coconut. Repeat with the remaining cakes and allow the icing to set. 
 
Assembly 
When the icing has set, slice each cake horizontally through the centre using a sharp knife. Using a pastry brush gently dab each cake half with a little of the vanilla syrup letting the syrup absorb completely before filling the cake. 
 
 
Spread the bottom half of each cake with a generous amount of jam then dollop or pipe the vanilla cream over the jam before sandwiching with the top half of the cake. Repeat the process with all the cakes then refrigerate until serving time. 


Even though I'm now back at work, I shared most of the cupcakes with my neighbours and they were pronounced delicious. Chocolate sponge, raspberry jam and cream. How could you go wrong? 

See you all again next week with some more baking from my kitchen.

Bye for now,

Jillian
PRINT RECIPE

tivoli road bakery sourdough fruit loaf

13 Jan 2022

It had to happen - I've succumbed to the lure of sourdough baking. It wasn't lockdown that drove me to it though, it was a long Christmas break at home in Brisbane with my Dad. To wile away the time I decided to make a sourdough starter and hoped the starter would develop sufficiently so I could bake with it before I had to return to Sydney. I have made a sourdough starter before and 'Audrey' is languishing somewhere in the freezer. Using Audrey I managed to successfully make some fruit buns then had a disaster with a sourdough loaf, which went straight into the bin. I've been too scared to make sourdough since then.

I didn't want to get too overloaded with discard so I used this recipe but halved the quantities. The starter was lively by day 7 so on day 8 when it passed the float test, I made some dough and the following day I had a beautiful sourdough boule.


I couldn't believe it and I wondered why it had worked out on my first attempt. I spent a week watching videos about sourdough baking on YouTube while the starter was developing.

I've made a lot of yeasted dough the past few years and I know I can manage a 70% hydration dough (the total water/total flour used in the recipe) but no more and many sourdough recipes have much higher hydration rates. Knowing this I got out my handy calculator and did a few sums to reduce the water content in the recipe to 65-70% hydration. I also refrigerated the dough overnight before shaping as suggested by Charlie aka The Chain Baker, who has many helpful videos on his site. I baked the dough in a preheated cast iron pot and voila, I had a loaf of crusty sourdough bread.

Emboldened I kept baking and produced a few more loaves including this delicious sourdough fruit loaf. I brought a small jar of starter back home with me on the plane and I liked the fruit loaf so much I've already made it twice albeit with a few tweaks.


The fruit loaf recipe is adapted from the Tivoli Road Bakery recipe, however I found 2 recipes online so the recipe is a mash-up of those two recipes plus things that worked for me.


Here's the recipe for you which makes a small loaf. For all my recipes I use a 250ml cup, a 20 ml tablespoon, unsalted butter and 60g eggs. My oven is a conventional oven so if you have a fan-forced oven you may need to reduce the temperature by 20°C. 


Fruit sourdough – adapted from a Michael James and Pippa James recipe from The Tivoli Road Baker. According to Michael 'This bread is great eaten fresh, and will keep for days. It’s also great toasted, with a nice spread of butter, as the spices really come through when it is warmed".


Fruit Sourdough Recipe
Fruit Soak
40g raisins 
40g currants 
40g sultanas 
50g dried figs, quartered 
50g pitted dates, halved 
100g dried apricots, halved
10g grated fresh ginger
1 cinnamon stick 
3 cloves
50mls orange juice
50mls water
 
Method 
Put all the fruit, except for the dried apricots, in a large container or bowl.
 
In a small saucepan, combine the grated ginger with the whole spices and the liquids and bring to the boil over medium heat. Once boiled, take the saucepan off the heat and let the mixture infuse for 10 minutes, then strain the liquid over the fruit. Discard the whole spices. 
 
Mix with a spoon until the fruit is evenly distributed and coated with liquid. Cover and leave at room temperature overnight, stirring occasionally to thoroughly distribute the liquid – you want it soaked through the fruit, not settled at the bottom. If leaving the fruit to soak longer than overnight, store it in the fridge.
 
Starter Build
40g starter
20g bakers flour
20g whole-wheat flour
40g water
 
Method
Around 4–6 hours before you plan to mix your dough, combine the starter, flours and water for the starter build, mixing well to combine. After a few hours ( I like to do this overnight) the starter should be bubbly and doubled in size. To test if the starter is ready to use, drop a small amount into a glass of water. If the starter floats, it’s ready to use. You will use 80g of this for the dough; retain the rest for maintaining your starter. 
 
Dough
250g bakers flour
50g whole-wheat flour
50g rye flour
25g white spelt flour
233g water
80g starter
The grated rind of 2 oranges
7g salt 

At least 30 minutes before you plan to mix the dough, combine the flours and water in the bowl of a stand mixer. Mix with your hands until thoroughly combined, then cover the bowl with a damp cloth and set aside. This process will hydrate the flour.

When the starter is ripe and bubbly, add it to the flour and water mixture, sprinkle over the orange zest and salt, then using the dough hook mix on low-medium speed for 5 minutes to form a slightly sticky dough. Remove the dough hook then cover the bowl with a damp cloth and set aside in a warm place for at least 30 minutes, before your do your first set of folds.

Thoroughly drain the fruit and pat dry with paper towels. Add the fruit soak and the apricots as you do the first turn and fold in the bowl, ensuring they are evenly distributed. If the fruit seems a bit wet, you can throw a little extra flour in. You want a slightly sticky dough, but not a wet dough. Complete four sets of folds (
this video shows you a technique you can use) resting the dough in between each one for 30–45 minutes. After your last set of folds, cover the dough with plastic and leave to prove at room temperature for 2–3 hours. After the 2 hour prove I like to place the covered dough in the fridge for a few hours to firm before shaping the dough.


Lightly oil an 18 × 11 cm (7 × 4¼ in), 10 cm (4 in) high loaf tin then line with a sheet of baking paper. Turn the dough out of the bowl onto a lightly floured surface and gently pat to redistribute the air pockets. Form into a rectangular shape and then fold the top 2 corners over to create a triangle. Roll the dough down towards yourself from the top down, using your thumbs to guide the dough in a spiral motion. You want to do this roll as tightly as possible to achieve oven spring during baking.


Place the dough into the tin, seam side down, then cover with plastic and leave at room temperature overnight. If it’s going to be a hot night and the dough is already feeling active, place it in the fridge, to be baked when needed. You want the dough to reach the height of the tin and to retain the imprint of your finger when gently pressed. If you’ve had the loaf in the fridge and it still looks small and feels dense, sit it in a warm place for 1–2 hours, until ready to bake.

Place a baking tray at the bottom of the oven, and at least an hour before you start baking; preheat the oven to the maximum temperature. When the oven is hot, boil the kettle and pour around 150–200 ml of boiling water into the baking tray. Place the tin on the middle shelf of the oven and bake for 20 minutes, until the loaf is starting to colour, then reduce the temperature to 200°C and bake for a further 20–25 minutes, until the top is a lovely dark brown.

Holding the tin carefully with a cloth, tip the loaf out and check that the sides are a nice golden colour and the loaf is firm to the touch. If it needs a bit longer, put it back in the tin and return to the oven for another 5 minutes before testing again. Tip the bread out of the tin onto a wire rack to cool. 

Notes

The proving time will vary depending on the temperature and humidity on the day so the time is just a guide.
 

I like the fruit loaf toasted then topped with butter and home made blackberry jam. Delicious!

See you all again next week with some more baking from my kitchen.

Bye for now,

Jillian

PRINT RECIPE

tahini sesame swirl teacake

10 Jan 2022

Welcome to my first post for 2022. I'm just about to return to work for the first time in 6 months. I baked up a storm during my break for those weekends when I just don't have time to bake.

 
This tahini swirl teacake was on my long list of 'Things to bake' and on the day I made the cake I was particularly distracted. 
 
 
I only had 3 eggs in the fridge and one of the eggs destined for the cake accidentally made it's way into the food scraps bin instead of the batter.


The recipe is dairy free but if you don't mind dairy, you could swap the orange juice for yoghurt. I think the addition of yoghurt would mellow out the tahini flavour a little. The cake is quite sweet so if you serve the cake with a dollop of yoghurt, which I did, the yoghurt helps to cut through the sweetness.


If you'd like a cake that tastes just a little different then maybe this tahini sesame swirl teacake is the cake for you. The recipe was adapted from 'Falafel For Breakfast' by Michael Rantissi and Kristy Frawley, whilst the black sesame swirl was pinched from a Claire Saffitz recipe. 

 
The original recipe called for a few tablespoons of sesame seeds which were folded through the batter. Instead, I ground up black sesame seeds added them to a portion of batter, alternated layers of the different coloured batters then did a few swirls with a chopstick. I have to say I'm mightily impressed with that swirl.


Here's the recipe for you which makes a makes a 5 cup bundt cake or a 17cm round cake. For all my recipes I use a 250 ml cup, a 20 ml tablespoon, unsalted butter and 60 g eggs. My oven is a conventional oven so if you have a fan-forced oven you may need to reduce the temperature by 20°C. The original recipe can be found here.

Tahini and black sesame swirl teacake 
Coating 
2 tsp white sesame seeds
2 tsp black sesame seeds
2 tsp sugar

Cake 
1½ tbs black sesame seeds
2 eggs
150g (⅔ cup) caster sugar
1 vanilla bean, split lengthwise and seeds scraped or 1 tsp vanilla extract
125 ml (½ cup) light extra virgin olive oil or neutral oil
160 ml (⅔ cup) orange juice or yoghurt
135g (½ cup) tahini
185 g (1¼ cups) plain flour
1½ tsp baking powder
Pinch salt

Method
Preheat the oven to 170°C, conventional. In a small bowl mix together the sesame seeds and sugar. Brush the sides of a kugelhopf or fluted ring (bundt) cake tin with butter or oil then sprinkle with the sesame seed mixture. Set aside in the fridge.

Finely grind the black sesame seeds in a food processor, spice grinder or with a mortar and pestle. Place into a small bowl and set aside.

Put the eggs, sugar and vanilla in a large bowl and mix using a wooden spoon.  Slowly add the oil, stirring. Add the orange juice and stir to combine. Add the tahini and mix well.  Sift the flour, baking powder and salt over the wet ingredients and then mix until just combined. Do not over mix.

Measure out 1 cup of the batter and add to the bowl containing the ground black sesame seeds. Mix until combined.

Pour about ⅓ plain batter into the prepared tin and then pour over ⅓ black sesame batter. Repeat the layering process until there is no batter left. Using a chopstick or knife gently swirl the batter a few times to create the swirl. Place the tin in the preheated oven and bake for 1 hour, or until golden and firm.
 
Allow the cake to cool in the tin for 10 minutes then turn out onto a wire rack to cool completely.
You can serve the cake with a dollop of natural yoghurt or enjoy it with a cup of mint and lemon tea.
 
See you all again next week with some more baking from my kitchen.
 
Bye for now,
 
Jillian
PRINT RECIPE
© DELICIOUS BITES • Theme by Maira G.